

Part 2: Digging Deeper
This is the second post in a series aimed at encouraging developers who have been dragging their feet about JavaScript’s new ES6 features. Part 1 of Embracing ES6 covered some of JavaScript’s tumultuous history and explored how the release of ES6 in 2015 marked a major improvement in the standard. To illustrate some of the new and improved parts of JS, we looked into the new variable keywords, arrow functions, and template literals.
More Good Parts of ES6
This post will dig a little deeper into some other new features: rest parameters, spread operators, object destructuring, default parameters, promises, and modules.
This new toolkit will encourage cleaner, clearer, more concise code without relying on third-party libraries. And this series intends to help you ease your way into the goodness ES6 has to offer, showing how these features can be used today to improve any codebase.
Rest Parameters
function containsRestParameter(regularParam, ...restParam) {
  ...
}
One set of ES6 features is helpful in situations when a function is looking to accept an unknown number of parameters or return an unknown number of values. Rest parameters and spread operators handle each of these situations, respectively. These features allow the number of items to remain flexible, but the code stays clean and easy to understand.
A rest parameter in a function allows an infinite number of parameters to be passed to that function as a NodeList, which is basically a JavaScript array in minimalist form. If you’ve ever used the arguments object to iterate over all parameters passed to a function, this is a much cleaner way of doing that.
When using the old arguments style, it’s unclear which parameters the function is expecting:
function acceptsInfiniteParameters() {  // wait, this function expects parameters??
  console.log(arguments); // prints [1,2,3,4,5]
}
acceptsInfiniteParameters(1,2,3,4,5);
With rest parameters, now it’s possible to define that the function is expecting an infinite number of arguments as well as clearly separate those infinite arguments from known, defined arguments, such as below:
function containsSomeInfiniteParams(firstKnown, secondKnown, ...allTheOthers) {
  console.log(firstKnown);     // you can target each known parameter like you would in a typical function
  console.log(allTheOthers);   // prints a NodeList of all other parameters: ['another', 'oh i forgot this one', 'and we need this too']
}
containsSomeInfiniteParams('hi', 5, 'another', 'oh i forgot this one', 'and we need this too');
At first, that ...paramName syntax looks a little funky, but think of how those expected parameters would be read off in English. You would probably say “that first known thing, that second known thing, …and then all the others”. Thinking of it that way, those three dots really make sense, as does the rest parameter name: it’s a parameter that takes in all the rest of your arguments.
Spread Operators
The spread operator can work in conjunction with rest parameters, or can be used on its own. It’s a little bit like the reverse of rest parameters in that it handles displaying an infinite number of items as opposed to passing them into a function. The syntax for spread operators is the same as rest parameters, prepending the name with those three dots. The difference is just whether it’s an input (rest parameter) or an output (spread operator).
To illustrate the basics of how the spread operator works, logging allTheOthers from the example above using the spread operator will print out everything as a concatenated string instead of a NodeList:
function containsSomeInfiniteParams(firstKnown, secondKnown, ...allTheOthers) {
  console.log(...allTheOthers);   // prints all other parameters as one long string: 'another oh i forgot this one and we need this too'
}
containsSomeInfiniteParams('hi', 5, 'another', 'oh i forgot this one', 'and we need this too');
There are some really powerful ways to use the spread operator in the real world. Any time you have a set of data to manipulate, the set can be represented with the three dots and incorporated into other JavaScript functions using that super clean syntax.
To combine arrays, the spread operator can be used to insert one array into another without using any fancy Array methods:
const dogs = ['Fido', 'Rover', 'Daisy'];
const cats = ['Misty', 'Felix', 'Shadow'];
const pets = ['Fred', 'Ginger', ...dogs, ...cats];
console.log(pets);    // prints ["Fred", "Ginger", "Fido", "Rover", "Daisy", "Misty", "Felix", "Shadow"]
Or, use the spread operator to pass an array into a Math function that compares all passed arguments:
const ages = [17, 6, 28, 14, 12];
const oldest = Math.max(...ages);
console.log(oldest);    // prints 28
Check out David Walsh’s 6 Great Uses of the Spread Operator for more details on how the spread operator can help clean up your code.
Object Destructuring and Object Initializer Syntax
Object destructuring is an ES6 feature that grabs specific properties of an object and assigns them to variables with the same name. Without destructuring, this requires writing a new line of code for each property that needs to be accessed from an object. ES6 object destructuring allows for the use of a comma-separated list of property names within curly braces to assign those properties as local variables.
Here’s the old, super-repetitive way of doing things:
function simpleMath(x, y) {
  const sum = x + y;
  const difference = x - y;
  return {
    x: x,
    y: y,
    sum: sum,
    difference: difference
  }
}

const mathObject = simpleMath(1, 2);
const x = mathObject.x;                    // 1
const y = mathObject.y;                    // 2
const sum = mathObject.sum;                // 3
const difference = mathObject.difference;  // -1
With ES6 syntax, the return values from simpleMath() are easily destructured in one line, instead of the five lines used above. The same return values are available as the example above; the only change is the way they are assigned to local variables:
const {x, y, sum, difference} = simpleMath(1, 2);
console.log(x);           // 1
console.log(y);           // 2
console.log(sum);         // 3
console.log(difference);  // -1
Destructuring also allows picking and choosing of which properties to assign to local variables, and they can be placed in any order. This can be helpful as the function grows and the return values change. Keep in mind that only the variables assigned with destructuring will be available:
const {difference, x} = simpleMath(1, 2);
console.log(x);           // 1
console.log(difference);  // -1
console.log(y);           // undefined!
This can go another step further. Using the ES6 object initializer syntax, the return object in the simpleMath() function can be reduced to one line, known as the property value shorthand. Think of this as the reverse of object destructuring. Instead of assigning variables based on their names, we’re returning variables as they are named. Now there’s no need to go through the whole {x: x, y: y} business. Much cleaner!
function simpleMath(x, y) {
  let sum = x + y;
  let difference = x - y;
  return { x, y, sum, difference };
}
Making use of these two features has reduced the lines of code by more than 50 percent, cutting it from 16 to 7 lines, while also cleaning up the general syntax. A developer can now quickly understand what’s going on.
Default Parameters
ES6 also introduces default parameters to JavaScript. Now, instead of having to check if a parameter is undefined before assigning it a value, you can assign the default inline with the parameter. Using that same simpleMath() function as an example, adding default parameters can act as a fallback while still preserving the functionality already set up:
function simpleMath(x = 5, y = 5) {
  let sum = x + y;
  let difference = x - y;
  return { x, y, sum, difference };
}
let {x, y, sum, difference} = simpleMath();
console.log(x);           // 5
console.log(y);           // 5
console.log(sum);         // 10
console.log(difference);  // 0
Now, if the method is called without passing any parameters, like above, the app won’t break and the default values will be used to calculate return values. In a more real-world scenario, this would be helpful if a variable being passed to the function was assigned an undefined value before being passed:
let initialX = getInitialXValue();	// say this returns 1
let initialY = getInitialYValue();	// say this returns undefined

let {x, y, sum, difference} = simpleMath(initialX, initialY);
console.log(x);           // 1
console.log(y);           // 5
console.log(sum);         // 6
console.log(difference);  // -4
Above, since initialY was passed with the value of undefined, the default value of 5 was used for the y variable, while the passed value of 1 was used for x.
Now that JavaScript has for reals default values, there’s no longer the need to use the or operator hack that has become so common (var x = initialX || 1). Not only can this syntax be really confusing for a more novice developer to wrap their mind around, but it also can sometimes produce unexpected results. In cases where a falsy value such as an empty string or 0 is passed, that variable would be assigned the “default” value.
Promises
One of the awesomest things about ES6 is that JavaScript finally has built-in promise handling! Up until the release of ES2015, writing vanilla JS required leaning on a 3rd party to handle asynchronous requests. And even then, most devs most likely learned about the depths of callback hell.
The concept of promises alone is pretty deep and can be difficult to wrap your mind around. For those new to promises, this really good tutorial on scotch.io shows how to use them with ES6. This slightly older article We have a problem with promises is also worth checking out.
In ES6, the Promise object has a clean syntax that helps make understanding how promises work easier. When initializing the Promise object, pass in an executer function that has two arguments:
resolve, a function to call when your asynchronous call has finished successfully,reject, a function to run if (or when) things go wrong.
The then() and catch() methods can be chained to your Promise object, which will run specific code once your Promise is resolved or rejected, respectively.
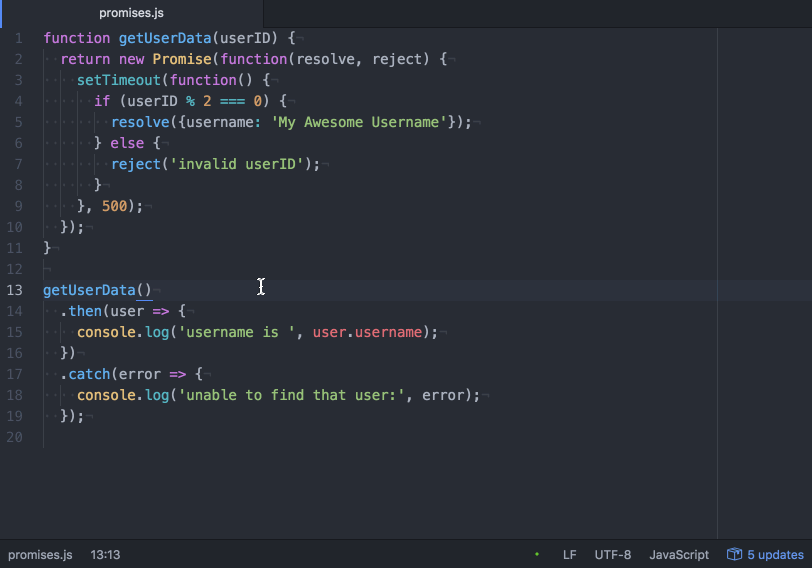
The below example makes an asynchronous request to get a user’s data based on an ID passed to the getUserData() function. To simulate the request, the contents of our Promise is wrapped in a setTimeout() function and the request is resolved as valid if an even number is passed as the userID:
function getUserData(userID) {
  return new Promise(function(resolve, reject) {
    setTimeout(function() {
      if (userID % 2 === 0) {
        resolve({username: 'My Awesome Username'});
      } else {
        reject('invalid userID');
      }
    }, 500);
  });
}
After calling getUserData() write code to handle the result of the Promise. Passing an even number will print out our hard-coded username property. Anything else will print the “invalid userID” error:
getUserData(1234)
  .then(user => {
    console.log('username is ', user.username);
  })
  .catch(error => {
    console.log('unable to find that user:', error);
  });
In action, if an even number is passed to this function, the resolve method will trigger code in the then block and print out “My Awesome Username”, and if an odd number is passed, the reject method will trigger code that’s in the catch block:
Another solution to callback hell is to use generators. The folks at Guru99 put together a comprehensive guide in their Node.js Generators & Compare with Callbacks of their Node.js tutorial.
Modules
As JavaScript applications have become more complex, the need for a modular system has grown. Modules allow for common code to be reused in multiple applications.
As with promises, the developer community found solutions around JavaScript’s lack of support for modular code. Popular techniques include Addy Osmani’s Revealing Module Pattern, CommonJS modules popularized by Node.js, and Asynchronous Module Definition (AMD) loading used by RequireJS.
With ES6, the implementation committee built on this groundwork and added it into the specification. A good comparison between these existing methods and the new ES6 module syntax can be found at this blog post.
The ES6 specification draws from CommonJS and AMD modules and includes its own built-in module loading system. The concise syntax allows, modules to be imported and exported into other files while keeping the code encapsulated, in its own file, and preventing it from polluting the global namespace.
The feature is also flexible in that it can handle both synchronous and asynchronous requests. Modules can be of any type (string, boolean, object, function, etc), and they can be exported by their name or by the more concise “default export”.
To use the default export syntax, add the export default keywords in front of the value that will become available to other pieces of code. In this example, a function that adds two numbers together (similar to the simpleMath example from earlier) will be made available. It is saved in a file called addition.js:
// modules/addition.js
export default function(x = 5, y = 5) {
  return x + y;
}
As an example of one way to use this function, import it into the file where it will be used, and assign it to a local variable named sum. The path of the module should be relative to the file that’s importing it, and the .js extension is assumed so it doesn’t need to be specified:
// app.js
import sum from './modules/addition';
console.log(sum(1,1));  // logs 2
console.log(sum());     // logs 10, using default values
The default export only supports one export per file. Multiple variables can be exported by using named exports. To make use of both sum and difference functions, export them both from a file called simpleMath.js:
// modules/simpleMath.js
export const sum = (x = 5, y = 5) => {
  return x + y;
}

export const difference = (x = 5, y = 5) => {
  return x - y;
}
Then, destructuring can be used to assign each function to a local variable when importing into app.js:
// app.js
import {sum, difference} from './modules/simpleMath';
console.log(sum(1,1));          // prints 2
console.log(difference(1,1));   // prints 0
It’s also possible to import all named exports from a module as assign them to a local variable name. From there, use dot syntax to access each export:
import * as SimpleMath from './modules/simpleMath';
console.log(SimpleMath.sum(1,1)); // prints 2
This showcases some of the simplest ways to use ES6 modules, but importing named modules and assigning them to local variables can be done multiple ways. I found Dan Martensen’s Build Better Apps with ES6 Modules to be super helpful while sorting out different options.
Overall, the modules feature of ES6 is arguably the biggest step forward for JavaScript. Those familiar with the CommonJS and AMD patterns may feel this is an annoying, different syntax to learn. But now modules are baked right in in to the specification. This means no more to relying on third party libraries, which can fall out of date with the specification or have their own sets of bugs, not to mention the hassle of determining which library is right for your needs.
And if this is an introduction to module-based systems, the value should be apparent. Pulling out reusable bits of code into one-off files that can be added to multiple projects can prevent having to rewrite that same simpleMath work over and over for each application.
Incorporating ES6 into Legacy Systems
The time is certainly now to get familiar with ES6 features! Now that the specification has been around for a couple years, the developer community has had a chance to kick the tires and see which features are most popular. The parts outlined here and in Part 1 seem to be the most helpful right now, and there’s no reason to shy away from incorporating them into applications today.
Cantina often works on on large-scale systems that have accrued a lot of technical debt. At first glance, this might seem like the worst place to start incorporating new ES6 features. However, when refactoring code to make it better and more performant, why not use the latest and greatest technologies to get there?
Once someone takes the lead and shows how incorporating ES6 features can make code easier to understand, others will follow their pattern. Especially when it becomes clear that it’ll make their codebase easier to maintain.
Start small when introducing ES6 into a legacy project.
Once the build system is properly transpiling newer features into currently supported code, find a bit of code that might be repeated in the codebase and break it out into a module. Add tons of comments to the code. Hold a workshop with other developers on the team to show them how this pattern can allow them to share and reuse code. This helps teams work together better and think in terms of the whole application. They can see how it all fits together rather than stay siloed in the single feature they may be focused on.
People tend to be resistant to change, myself included. But once the benefits of this new scary thing become clear, it’s easy to get excited about finding new ways to solve problems. The handful of ES6 features gone over in this series all help to clear up some of the negative press JavaScript has gotten over the years. With these features, code is easier to read, manage, and debug. Once your team gets past the fear of learning a new thing, they will thank you!