
If you’re not careful, it becomes quite easy to paint yourself into a corner trying to keep up with the visuals of an app as it evolves. Fortunately, there’s an approach that helps you manage this compounding complexity.
I recently completed a project where I helped a client build an educational app from the ground up. We were fortunate enough to work with an extremely talented designer who was very aware of the difficulties that come with creating an entirely new UI, including all the little details most people normally take for granted. Out of all the work I did, I think I am most proud of building the buttons.
Yes, the buttons. You heard me right.
Buttons are the cornerstone of every interface—you use them every day and probably never give them a second thought. However, they contain a surprising amount of intricacy and are a frequently under-implemented interface element.
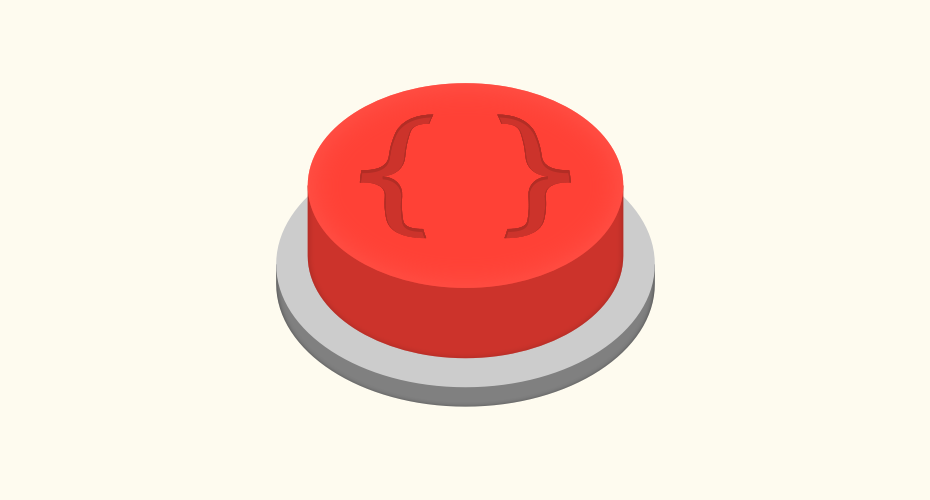
#Initial design First, following some sketching, we were provided with a basic button design. Here’s an approximation:

This is pretty easy to style in CSS. The important parts to consider at this stage were to:
- Use the proper
<button>or<input type="button">tags. - Break this element out into its own partial for encapsulation and ease of maintenance.
- Ensure that it worked at both a mobile breakpoint and on larger screens.
Refinement
The designer then followed up with an artboard containing all the different permutations a button could take:

As you can see, the “core” button design has been tweaked in anticipation of different use cases. Now the task becomes a matter of categorizing what these different tweaks represent functionally. I say functionally because while the visual layer of the button may change (in fact, we went through about 4 different palettes during development), its intent will probably remain the same.
Let’s map this out:
- The original button uses a red color, so it is assigned a priority of primary. Blue is next, so it gets secondary. Last is gray, which becomes tertiary. We now have three tiers of importance to select from.1
- The original button is the second largest size, so it is assigned a size of medium. One size larger and one size smaller are assigned sizes of large and small, respectively. Now we have both importance and scale.
- The original button has a solid background color. We can see that there’s also a treatment where the background color is removed and assigned to the outline instead. We’ll call the new treatment hollow.
Using an intent-driven naming scheme is also great for future development efforts, as purpose becomes immediately apparent in the source code.
Compare the meaning behind <button class="button button--primary button--large button--solid">Save</button> versus <button class="red-large">Save</button>. Verbose? Yes. But red may one day become green, and chances are the main button on a page will stay for as long as that page’s purpose remains relevant.
An observant reader at this point may be wondering if size is a property of intent, or if you’ll ever have a large secondary button. Although size itself doesn’t semantically communicate purpose, visual prominence does reinforce hierarchy. An observant, jaded experienced reader might also know that circumstances like needing a large secondary button does tend to sometimes happen.
Another important thing to note is smaller, descriptive classes create flexibility when devising your naming scheme. Instead of making and maintaining ~33 classes to handle every possible permutation mapped out above, we can quickly and fluidly chain these three categories together on the fly.
Taking our new categories to code, we leverage the power of Sass, a CSS preprocessor to create nicely scoped nested selectors.2 First up is to note everything the categories described above are not.
As these properties are shared, and not affected by the categories’ different properties, the grouping provides a stable, immutable foundation that we can build off of. Simple, self-contained, and easy to maintain.
.button {
  background-color: transparent;
  border: 0;
  color: #fefbef;
  font-family: 'Open Sans', sans-serif;
  font-weight: 600;
  line-height: 1;
  margin-top: 1.5rem;
  width: 100%; /* Large, mobile-friendly touch target */

  /* Media Queries */
  @media (min-width: 37.5em) {
    width: auto; /* Smaller buttons on larger screens */
    padding-left: 2rem;
    padding-right: 2rem;
    margin-left: 1rem;
    margin-right: 1rem;
  }
}
It then becomes a simple matter of describing the categories as tweaks that sit on top of this stable core. Each category only contains what it needs to describe the changes in the button’s appearance, and nothing else:
See the Pen Categories: Building a better button in CSS by Eric Bailey (@ericwbailey) on CodePen.
The Plot Thickens
Now we have buttons that can quickly and reliably change size, color, and background treatment. Enter stage left: buttons with icons!
This is a totally valid request, icons are used with buttons all the time—it’s just a fourth category we can add to the existing three. A small, hollow tertiary button with an icon? Sounds perfectly viable to me.
See the Pen Icons: Building a better button in CSS by Eric Bailey (@ericwbailey) on CodePen.
We’re using the <use> property of SVG to display the icons declared invisibly in the top of the document, then writing scoped selectors to style any SVG within .button. Like magic, CSS’s first variable, currentColor, handles coloring the icon appropriately, regardless of if it is a solid or hollow treatment being used.
Again, it’s worth pointing out that with this approach we now fluidly and easily support the ~34 possible combinations and a potentially unlimited number of icons.
The Plot Rethickens
We’ve got a pretty robust button solution at this point, but there is another curveball to consider: background color. This app has two possible background color treatments: light and dark. As it is an educational app, it had to conform to WCAG AA accessibility compliance criteria, which includes specific language about acceptable contrast ratios.

It was discovered that some of the button background colors weren’t high enough contrast to use on a dark background, so the designer updated the palette. This gave us another dimension to consider, one that I wound up calling a context query.
The tricky part about the button’s background color is that it is affected by what it is placed on, and that sometimes that placement is unknowable, or will actively change. This is a reactive issue, not a descriptive one.
Taking advantage of Sass’ ampersand feature3, we are able to create some basic logic that looks for a parent class declared higher up in the document’s source, then apply styling instructions to its child (in this case, the button).
The site used two theming modifier classes to control background color: background--light and background--dark. These classes were typically applied to the document’s <body> tag, but could also be applied to things like a modal’s outermost <div>. Most of the time, the app uses the light background, so I approached developing this aspect with a “light background first” mindset. Again, we are targeting the core treatment, then making small tweaks as needed.
The neat part is that the parent class is the closest applicable declaration above it in the source order. In more practical terms, you can have a light background page displaying a dark background modal, and the button in the modal will have the proper high-contrast background color, all without having to juggle declaring any additional modifier classes via JavaScript.
See the Pen Contextually Aware: Building a better button in CSS by Eric Bailey (@ericwbailey) on CodePen.
I should warn you: this kind of selector is both powerful and brittle. Without strict namespacing and well-defined component classes, there’s a good chance you’ll get unanticipated style collisions if you use this technique for multiple items. Employ it with a healthy dose of caution and discretion.4
The State of Things
Okay, phew. We’ve got our buttons locked, loaded and ready to go. One last detail needs to be addressed: state.
State is hugely important in UI. It provides affordance for how people can (or cannot) interact with your UI elements. Buttons are workhorses, so it is critical to have their various states described in detail.
It is a cross-cutting concern in that it applies to every button, regardless of how it is configured. Predictability is a huge factor for creating something that is easy to use, so we want all of our buttons acting the same way.
Out of the box, CSS provides three pseudo classes that are applicable to buttons: :hover, :active, and :focus5. There’s also the disabled HTML attribute, as well as ARIA’s aria-busy="true", both of which can be applied to the <button> and <input type="button" elements>. We can target them using attribute selectors. No messy application of stateful classes with JavaScript needed here, just the simple application of a semantic attribute:
See the Pen States: Building a better button in CSS by Eric Bailey (@ericwbailey) on CodePen.
Since these are built using semantic <button> elements, you can use tab to navigate from element to element, and space to trigger a button press. To quote my embearded coworker Mike, “Nooice!”
Supermoves
Now comes the part where you start wrapping your element in a component to do things to it. We’re not adding this behavior to the button directly because other things could conceivably live in this area—help text, links to support articles, additional form controls, etc.
Yes, we are ramping up the complexity, but with all of the above safely scoped to just the .button class, we’re free to apply more styling and logic without having to worry about unanticipated rule collisions.
In this app, the primary action button’s terminal area would be placed highest up on mobile, but also in the rightmost position on larger screens. One of the advantages of the the button a person is most likely going to want to interact with being highest on mobile is that it is coded into the document’s source order first. This is great for people who navigate via screen readers—it saves them from having to listen to “Cancel, button.” over and over again before hearing “Upload file.”
Rather than running off to write some crazy DOM reordering JavaScript, we can use CSS to automatically handle this behavior. Flexbox has properties that can affect an element’s visual order. Combining that with media queries, we can write logic that moves things around to accommodate the viewport’s current size.6
As an added bonus, since we placed our primary action in an accessibility-friendly position first at mobile, we are unaffected by the keyboard navigation issue for flexbox ordered content.
See the Pen Working with a component: Building a better button in CSS by Eric Bailey (@ericwbailey) on CodePen.
Jerk Mode: Activate
As briefly mentioned 7 on a recent podcast (note: we have a podcast!), there’s one additional step we can take. Using CSS’s :not() selector, we can create some additional logic to reinforce authors only using semantic markup for buttons.
Now, if buttons are written in a way that would render them inaccessible, their visual appearance is changed to something that makes it immediately apparent that it is being improperly implemented:
See the Pen Jerk Mode: Building a better button in CSS by Eric Bailey (@ericwbailey) on CodePen.
If you’re interested in learning more about how and why buttons are used in modern web applications, Front-End Engineer Marcy Sutton has an excellent post outlining the hows and whys. Accessibility Consultant Heydon Pickering also makes an excellent bookmarklet called Revenge.css that expands on the “jerk mode” technique demonstrated above.
Putting It All Together
See the Pen Putting it all together: Building a better button in CSS by Eric Bailey (@ericwbailey) on CodePen.
Instead of class names derived from the element’s visual portrayal, go with its underlying intent. Instead of being descriptive and documenting only what is shown, attempt to be prescriptive and construct a modular system that can accommodate the smallest of tweaks all the way up to the largest of sweeping changes.
CSS’s cascade can be intimidating to work with at first, but embracing it can save you a lot of time, effort, and anguish down the line. If you’d like to have this sort of thinking applied to your project, get in touch to see how we can help!
-
I’m using variables in this post because they’re a little easier to understand, but the actual production version used Sass maps to control color globally throughout the app. That’s a whole topic unto itself, but making a variable any time you find yourself repeating a value throughout a component is solid advice. ↩
-
Speaking of repeating yourself, a developer who has some experience with Sass may notice that some property declarations are duplicated in the nested selectors. This is to make the examples a little easier to understand for people who have less familiarity with CSS preprocessors. A judicious application of loops and mixins could make the example more terse and performant. ↩
-
Some people prefer not to use
&for the sake of legibility and findability. This is totally okay! The important takeaways here are A) safely scoping your element and component styling and B) adhering to one method and writing it consistently cross-team. ↩ -
In a development setting, you could add a very noticeable fallback background color (fuchsia, anyone?) to make sure theming classes are applied, then remove for production. ↩
-
It’s important to note that the browser includes a default treatment for
:focus. A lot of boilerplate code unfortunately removes it for the sake of “cleaner aesthetics”, which is a terrible thing to do. If you do provide a bespoke focus style, make sure it is visually apparent with proper visual contrast. ↩ -
If you can’t use flexbox, this can also be achieved with the good ‘ol fashioned
floatproperty. ↩ -
Starts at the 10:29 mark. ↩