
Adobe Photoshop’s generator has become an excellent tool for generating image assets on the fly, especially when designing for different device resolutions. For designers, this removes the need to slice, hide/unhide, or copy assets to a new file to export each one manually.
Why does this matter?
It saves designers a lot of time by automating the process. It’s simple, just rename your layers or groups, add the file extension to each layer name and Photoshop will automatically generate your image assets every time you hit save. No more “Save for Web,” and waiting for Photoshop to render each individual layer image.
How does this work?
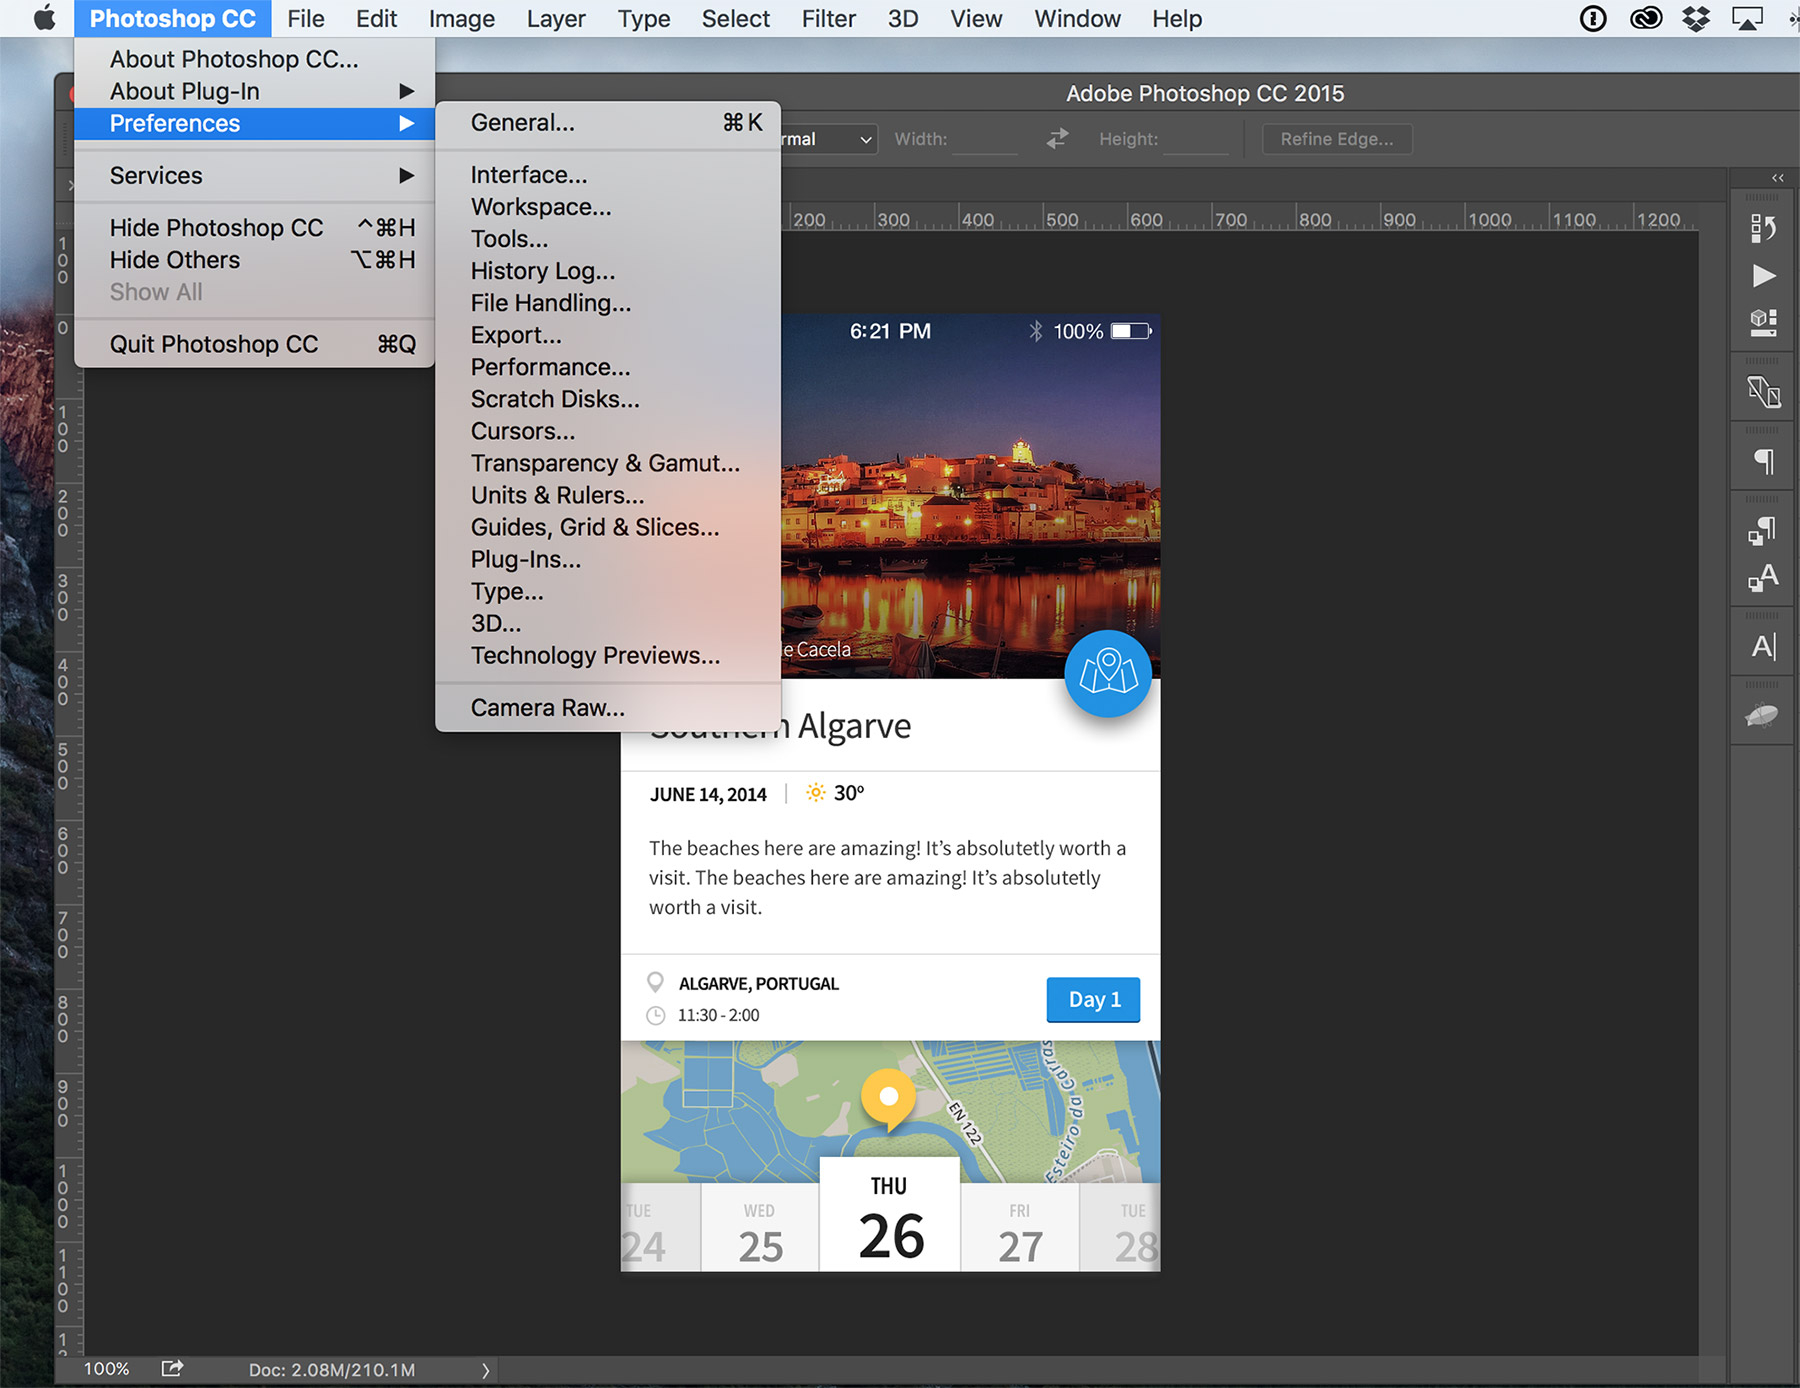
First, you must be running either Photoshop CC 2014 or 2015 to enable adobe generator. Once Generator is enabled, name your layers using Photoshop’s special naming syntax for assets to be automatically exported.
-
Go to Photoshop > Preferences > Plugins
- Check Enable Generator and tap "ok".
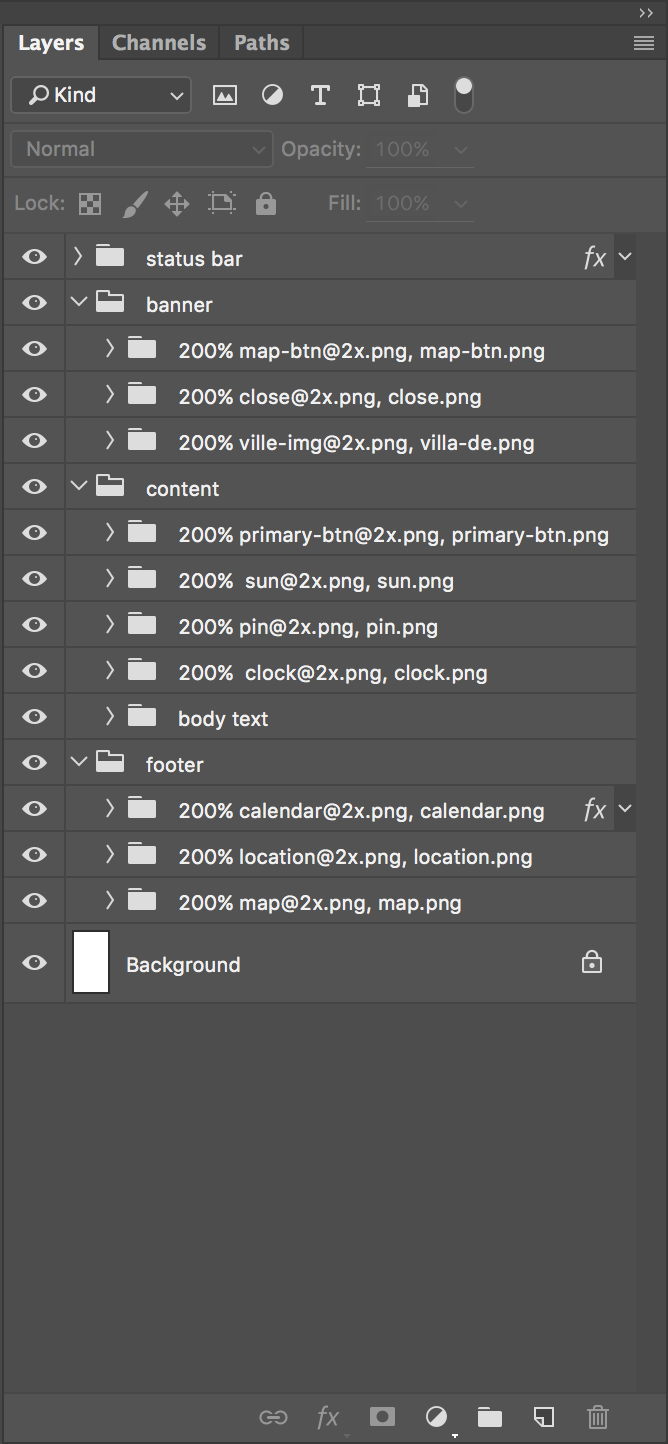
- In the layers panel, rename any layer with a shape, bitmap, smart object or layer group you want to export. Artboards and nested layer groups can also be exported when using Photoshop’s naming syntax.
Examples of supported extensions:
- .png
- .jpg
- .gif
- 1-n%, (Number) px x (Number) px for scaling
Examples of how to use these extensions:
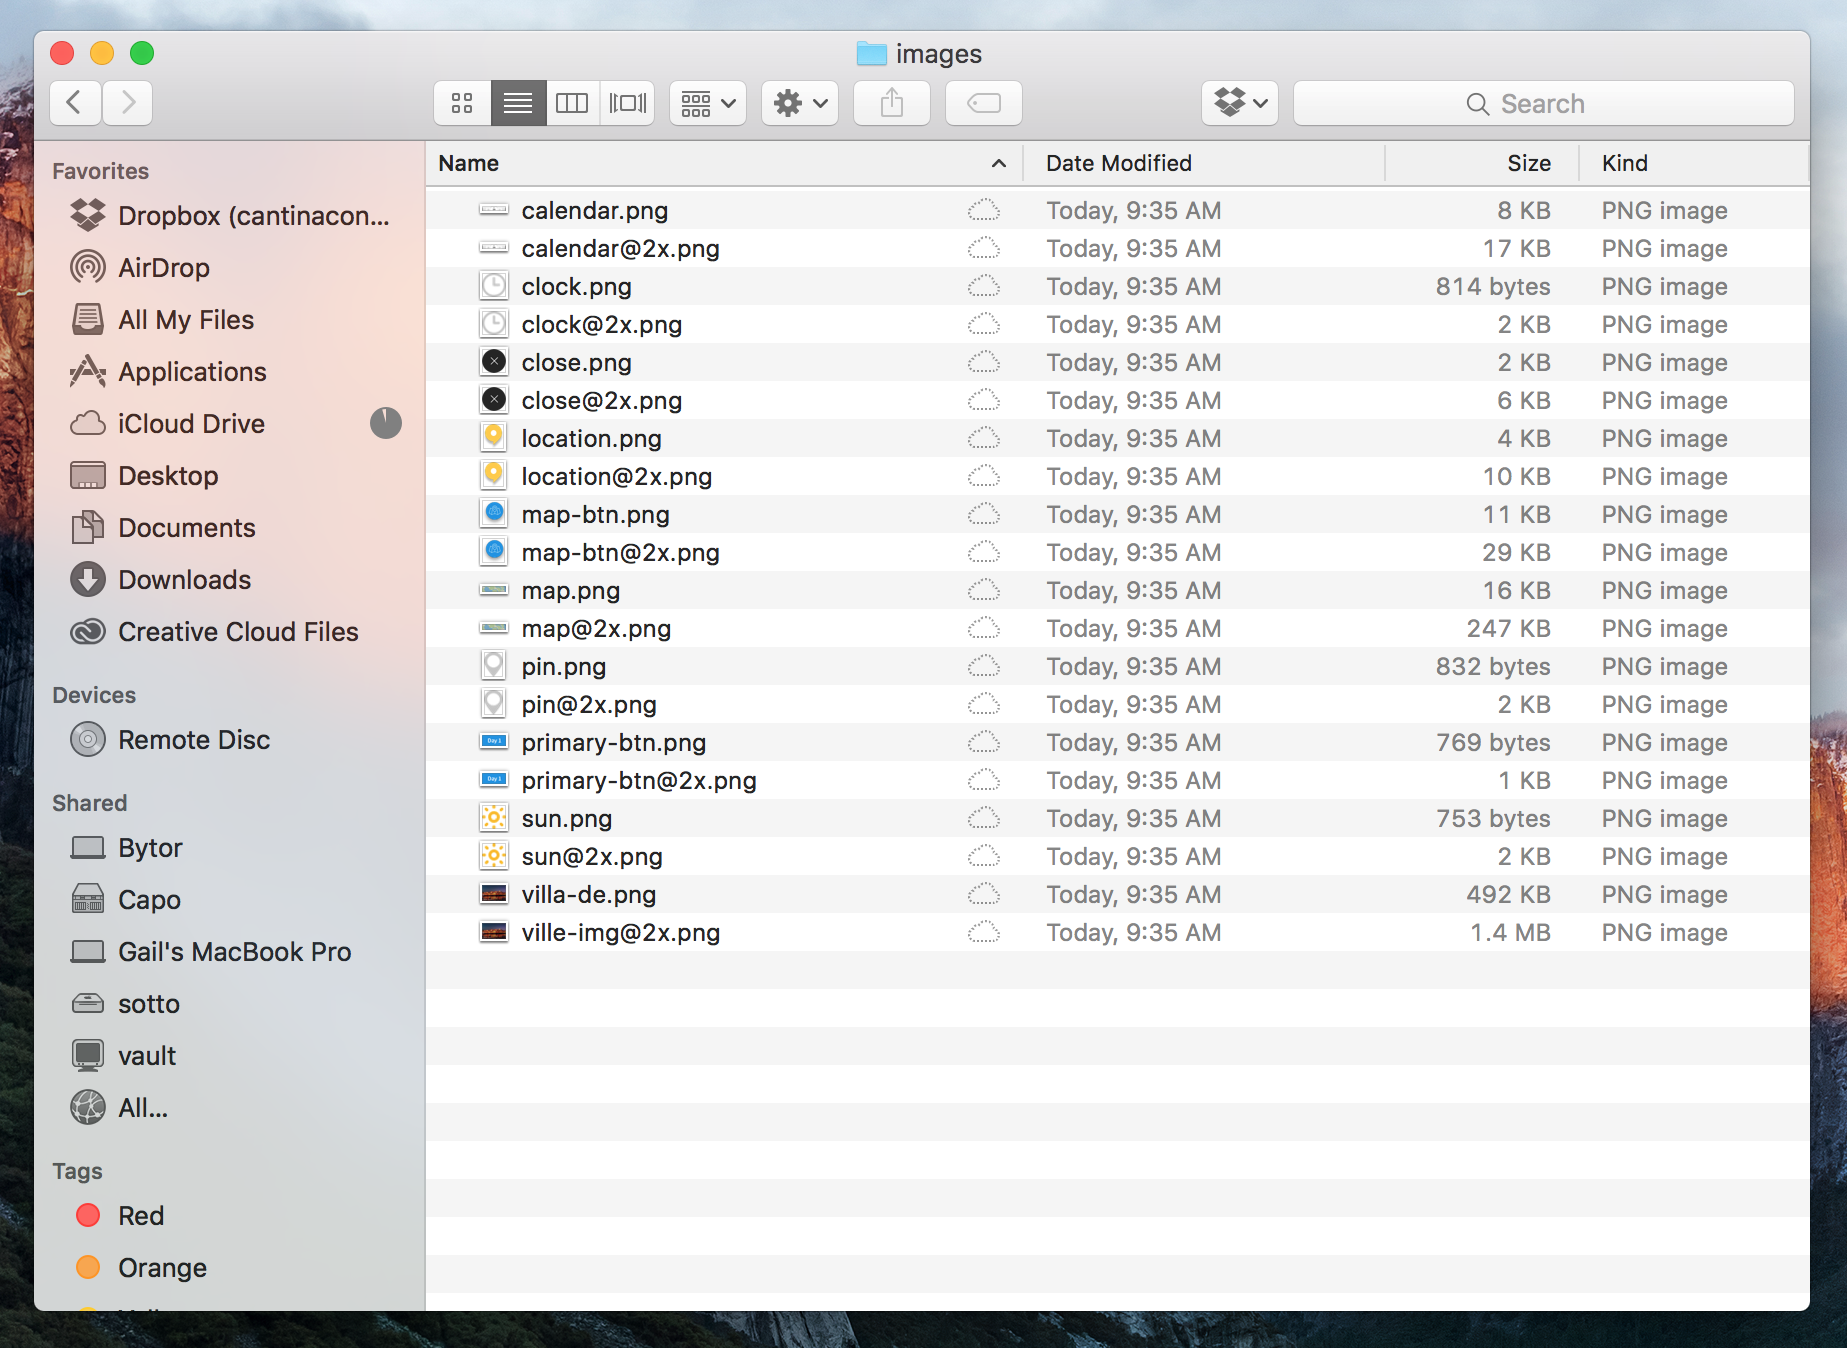
- “200% background@2x.png, background.png” produces assets at 1x and 2x.
- A “300% primary-button.png” produces a png asset @3x. “Background.jpg10” produces an image @1x with max quality.
- For compression options, add a percentage syntax after the layer extension .png or .jpg. For example, “banner.jpg100%, banner.jpg80%” produces images using 100% and 80% compression.
- For producing complex sets of images, combine custom syntaxes using scale, compression and image type. “200%banner.jpg80%” produces a jpg asset @2x using 80% compression.
- Go to File > Generate > and enable Image Assets
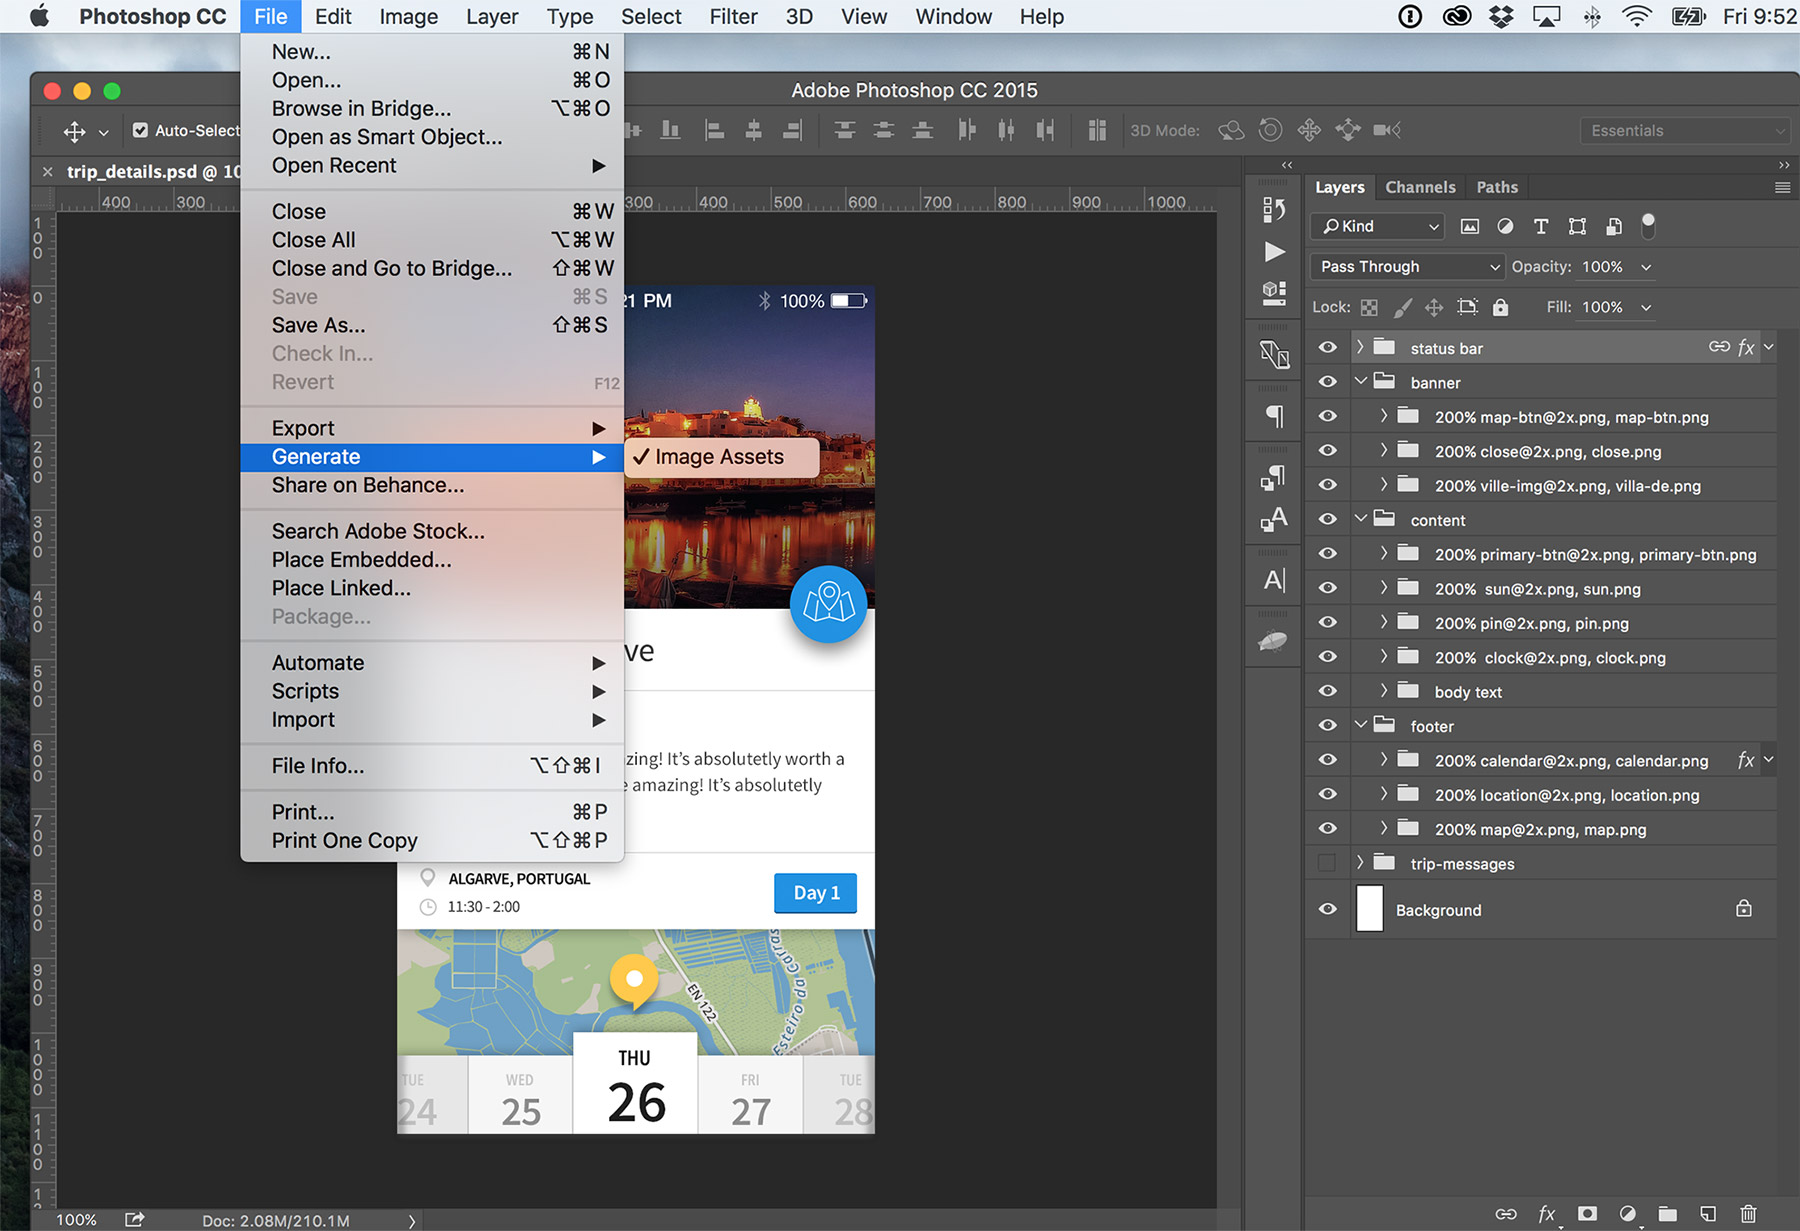
- Now hit save and your assets are exported to the original folder as your PSD.
Looking for some advanced tips?
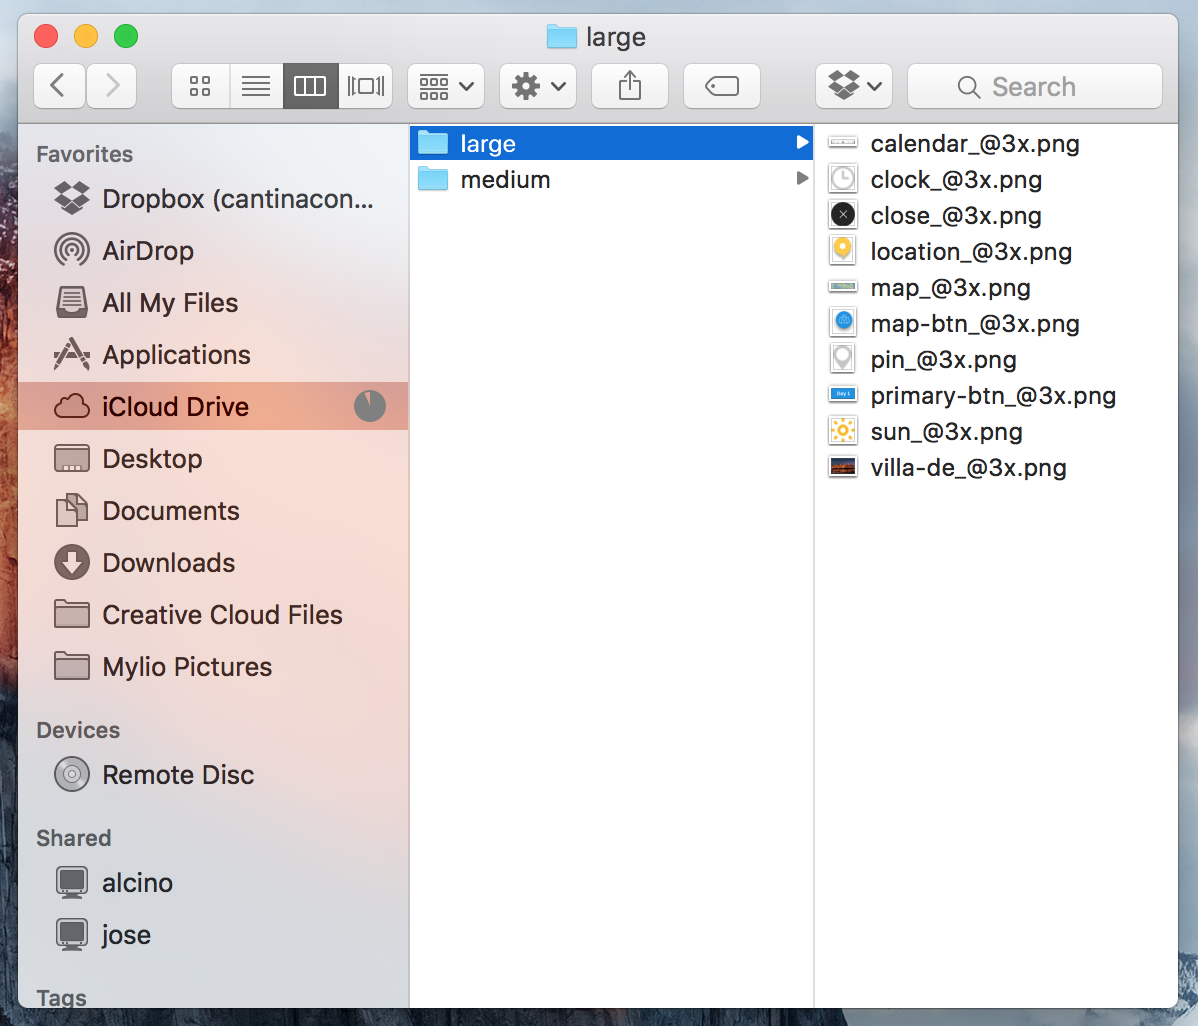
I know the approach above can seem a bit tedious, so let’s try a more advanced option. Lucky for us, there’s a default setting that can be applied across all layers in your document. Let’s create an empty layer at the top of the layers panel, make sure it’s the first layer in your document.
- Add “default 300% large/_@3x + 200% medium/_@2x.”
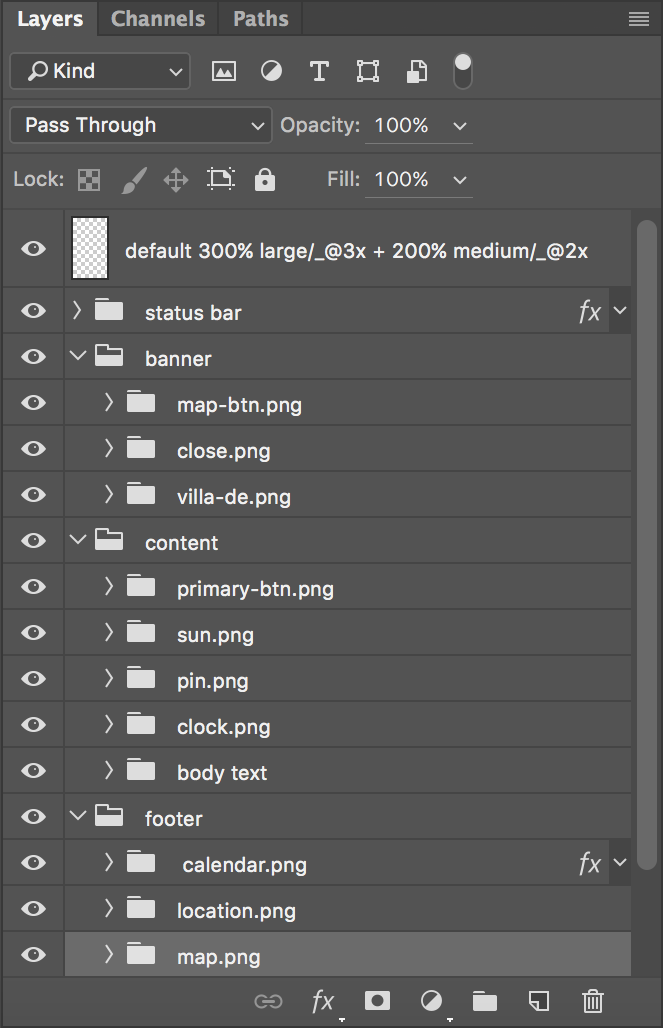
By using the keyword “default”, this layer now becomes the default setting for your document. The “300%” and “200%” sets the scales, which produce assets @2x and @3x. We then use “large/“ and “medium/“ to define the folders for our assets. The“@3x” and “@2x” suffixes gets added to your file names. The last step was to add an extension to each layer like “.jpg” or “.png”, hit save and Generator will output your assets.
Final thoughts…
Adobe Generator is one of the best tools for producing complex image assets in real-time. I now produce images at different resolutions with minimal effort. It’s easy to learn and saves hours of tedious work.