

For a large part of my career, some form of testing has been part of my developer’s toolbelt in one way or another. Whether that testing was making visual comparisons while building a Canvas rendering library, end-to-end testing with CasperJS, or Test Driven Development (TDD) with Mocha, I’ve tested my code in one way or another.
When I first got into Unity development, I instinctively gravitated toward functional programming and TDD. But learning Unity and having to deal with its multiple contexts, the physical space and its connection to scripting, has made implementing testing an interesting ride.
This series of blog posts won’t give you all the answers, as I’m still looking for them, but it will point you in the right direction for writing solid unit tests in Unity.
(Not) Writing Your First Test
Setting up a unit test in Unity is so simple that you don’t even have to type anything. Right-click in the project window and select Create > Testing > EditMode Test C# Script. This will automatically add two fully functional tests to your project.
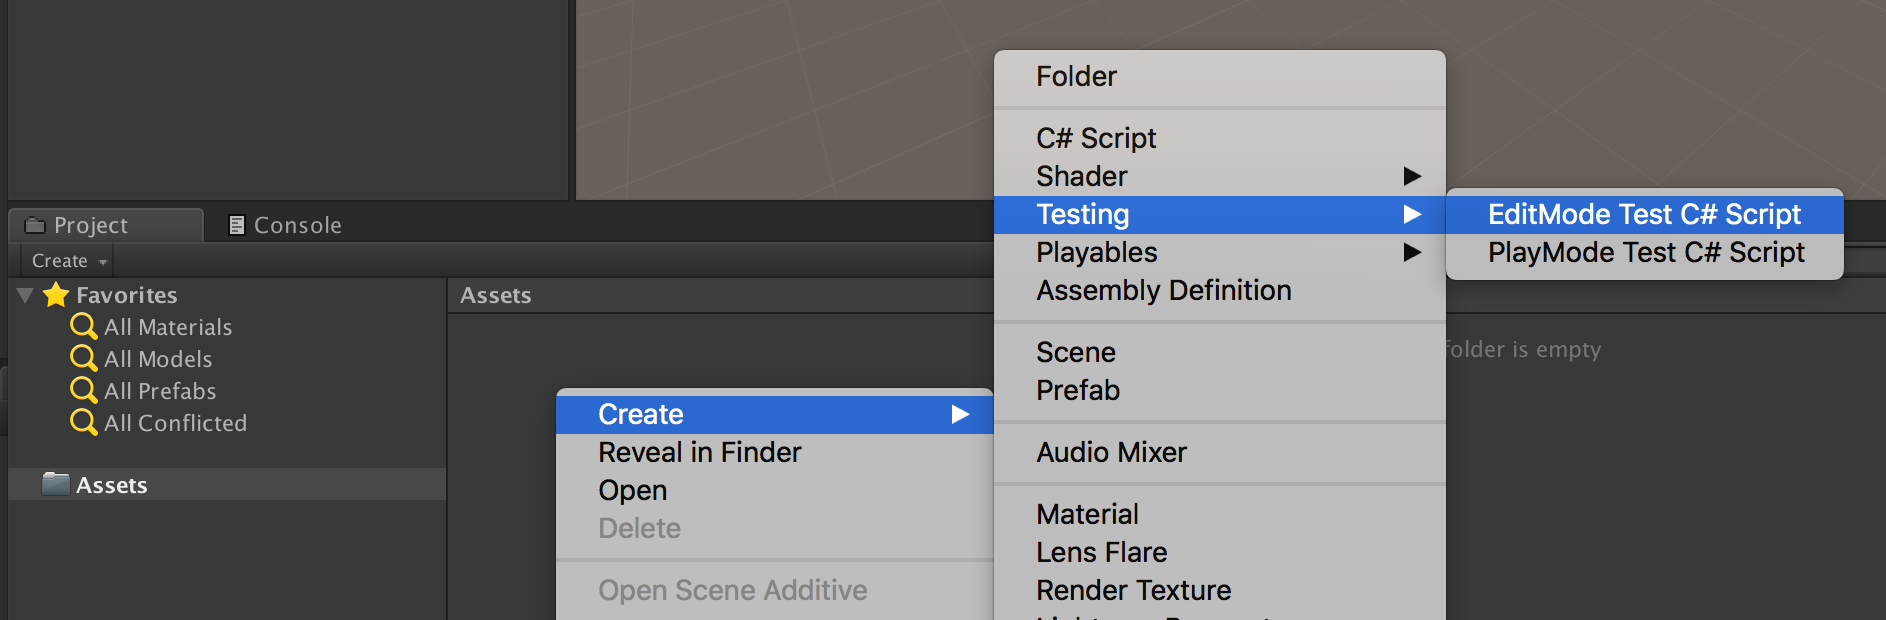
Before editing them, fire up the test runner and see them in action. Go to the application menu Window and select Test Runner.
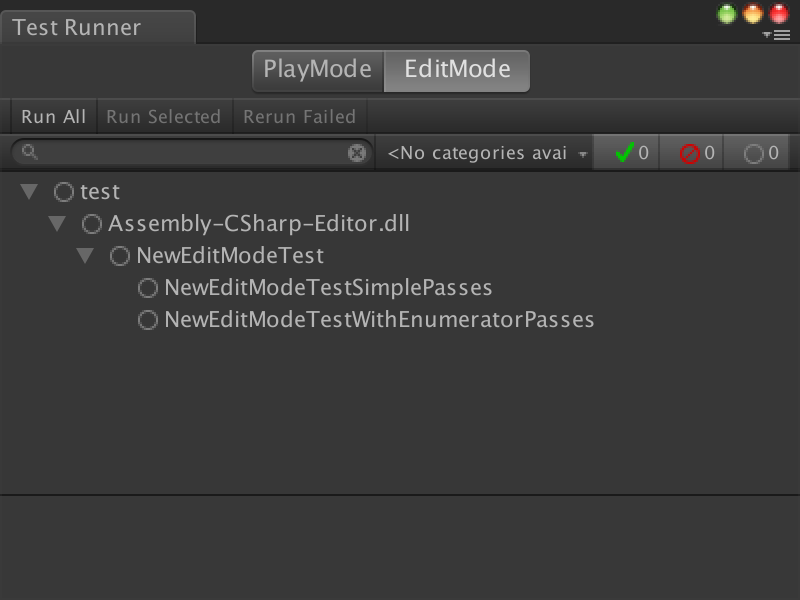
With the Test Runner pane open, make sure the Edit Mode tab is selected and press the Run All button.
Both tests you created should run and pass. 🤞
If they did, then you just successfully ran your first unit tests in Unity!
Writing Your First Test
Now that the two sample tests run, let’s write one of our own.
Open the file the NewEditModeTest you created earlier — assuming you didn’t change the name – and add the following code:
[Test]
public void BasicTest()
{

    bool isActive = false;

    Assert.AreEqual(false, isActive);

}
This is one of the simplest tests to create in Unity. It has no knowledge of the world outside of itself and needs no advanced calculations to determine pass or fail.
What exactly does it do?
The [Test] at the top signifies that this is an Edit Mode test. The body of the test is simply an assertion confirming the variable isActive is what you expect it to be – false.
Now let’s try something more fun.
Catching Errors
Things are going to break. It’s the nature of programming.
Sometimes programmers want to intentionally throw errors to make sure others (and themselves) know that something has gone awry, that a method received information that it wasn’t expecting. This is a good place to test these type of errors to make sure they actually prevent folks from going down a rabbit hole t of unnecessary debugging.
[Test]
public void CatchingErrors()
{

    GameObject gameObject = new GameObject("test");

    Assert.Throws<MissingComponentException>(
        () => gameObject.GetComponent<Rigidbody>().velocity = Vector3.one
    );

}
This test is structured similarly to the first test in that it’s mostly self-contained. However, in this example a new GameObject is created and added to the active scene. The test is attempting to set the velocity of the attached Rigidbody. But this GameObject was just created so it does not have a Rigidbody and should throw an error.
Note that this example is looking for the specific exception MissingComponentException. To adapt the test, change your code to whatever exception you are testing for.
Running Multiple Tests
When running tests that create and destroy GameObjects, a good practice is to reset the environment to prevent unintended side effects from previous tests. This is easily accomplished with the following code snippet.
[SetUp]
public void ResetScene()
{

    EditorSceneManager.NewScene(NewSceneSetup.EmptyScene);

}
I tend to add this to each one of my tests files, even if I’m not creating GameObjects. If it’s always there I don’t need to remember to add it when I do include a test that creates GameObjects.
The Difference Between Edit Mode and Play Mode Tests
Unity testing includes two kinds of tests. While they look fairly similar in both code and in the Test Runner they execute quite differently.
Edit Mode
- Monobehaviour methods
AwakeandStartare not invoked. - Test run directly in the editor
- Test run really fast
Play Mode
- All Monobehaviour methods are invoked
- Test run in a standalone window
- Test run slow, depending on the build target
Developers who write code functionally you should be fine using Edit Mode tests. Once an app becomes more complicated and has interaction spanning multiple scenes, it may be time to look into Play Mode tests.
At this point you should know how to write simple tests that can check simple assertions, catch errors and run in both Edit Mode and Play Mode. It’s time to start adding them to your own project.
This might feel tedious for those who haven’t worked with tests much before. trust me, once you have a few tests written and you can validate that changes you make are working as they should, you should love it.