
tl:dr - Use the AR Foundation Components plugin to get a basic AR app or game working without writing any additional code.
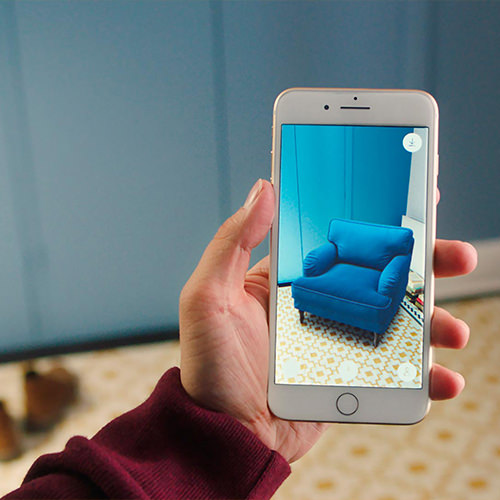
AR is amazing. You hold up your phone or tablet, point it at the world you know, and it changes right in front of you. The immersion isn’t on the level that VR is known for, but it’s enough to enjoy. For me, it’s about giving the user the ability to cause a digital object to collide or interact with objects in the real world.
I’ve been working on an AR game for the better part of a year and I have come to the following conclusion: developing a game in AR is very time consuming and not for reasons that are fun. The majority of the time working on AR aspects of an game is spent waiting on builds, testing and repeating the process until you achieve success. So while this process is inevitable in any situation where hardware is involved, there are open source projects that can help alleviate a portion of this wasted time.
Unity’s AR Foundation is a plugin that helps developers build AR apps and games for both iOS (ARKit) and Android (ARCore) using the same code. While the APIs are useful, they can be confusing to navigate for first-time developers. I built an open source plugin that takes these APIs and exposes them through custom components that are as easy to use as built-in Unity components. The following steps will guide you through setting up your first AR app using AR Foundation, ARKit, and these custom components, all without writing any code.
Prerequisites
- Unity 2018.3 or later - this version allows for installing custom plugins with git URLs
- The latest Xcode
- An iPhone with at least iOS 11 - ARKit was first made available on iOS 11
Install plugins
Before we can get started adding components to our scene, we must first install the necessary plugins.
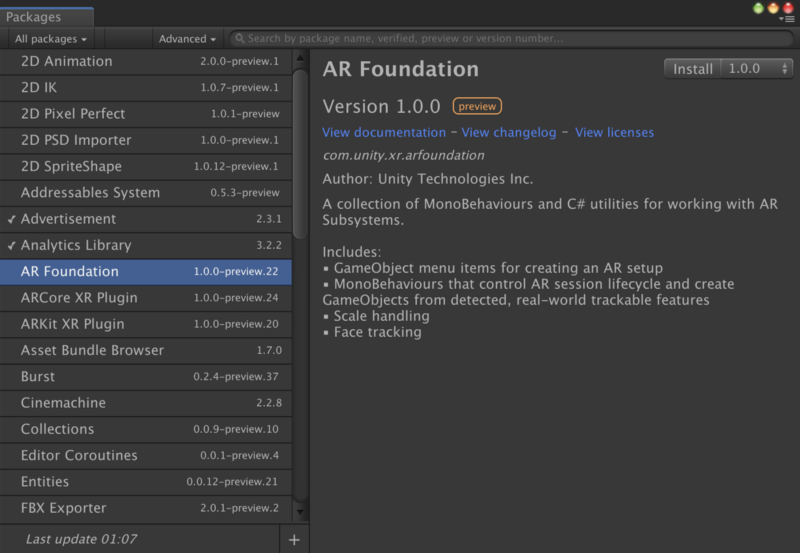
First, open up the Unity Package Manager which can be found by navigating to Window > Package Manager. Once there, look for a drop-down labeled Advanced. Select the only item in the dropdown labeled Show Preview Packages. The list of available packages shown in the dialog will now expand to include preview packages.
From here, install both AR Foundation and ARKit XR Plugin.
The next part is slightly tricky as it’s not officially supported in the latest version of Unity.
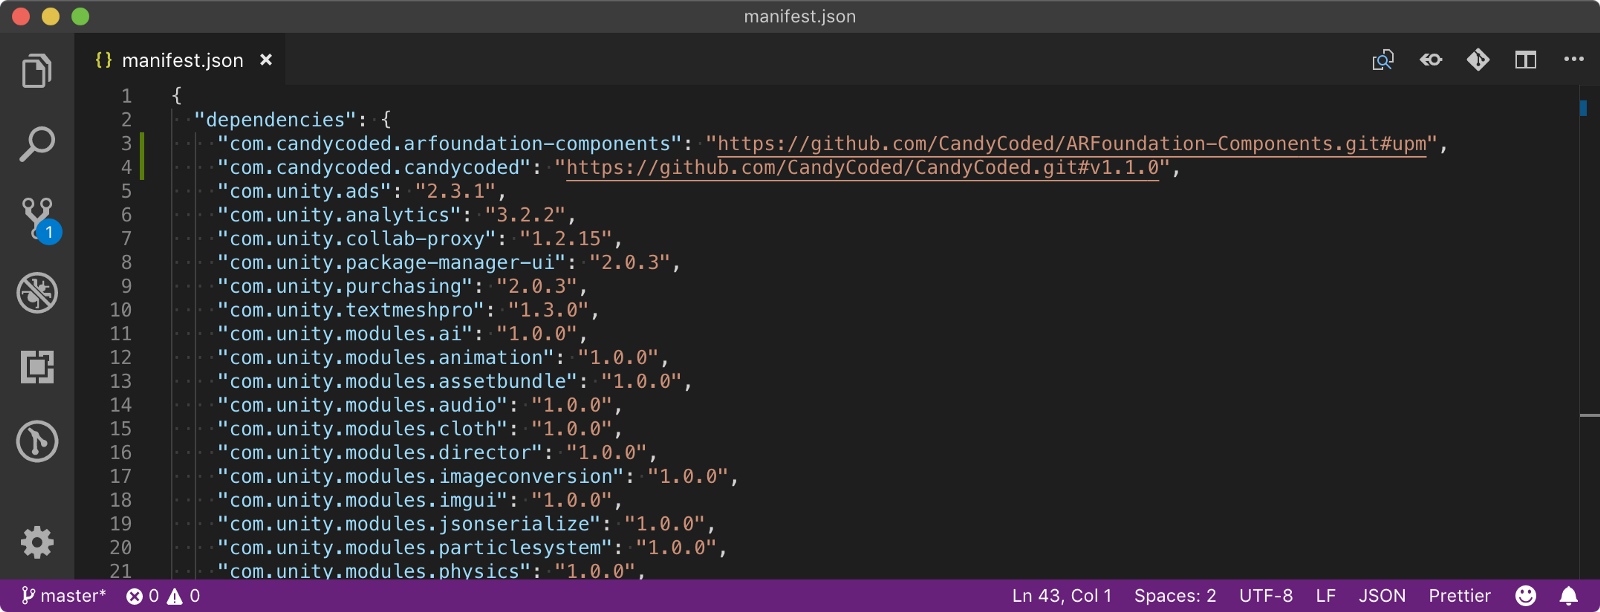
Open up the file Packages/manifest.json in your favorite text editor and add the following lines. These are URLs referencing two plugins from the CandyCoded project.
{
    "dependencies": {
        "com.candycoded.arfoundation-components": "https://github.com/CandyCoded/ARFoundation-Components.git#upm",
        "com.candycoded.candycoded": "https://github.com/CandyCoded/CandyCoded.git#v1.1.6",
        ...
    }
}
Switching back to Unity will automatically install the plugins.
Setup AR Foundation
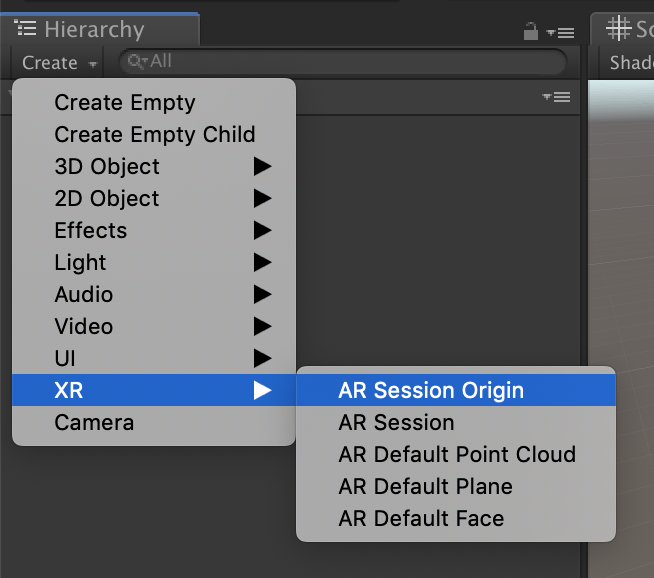
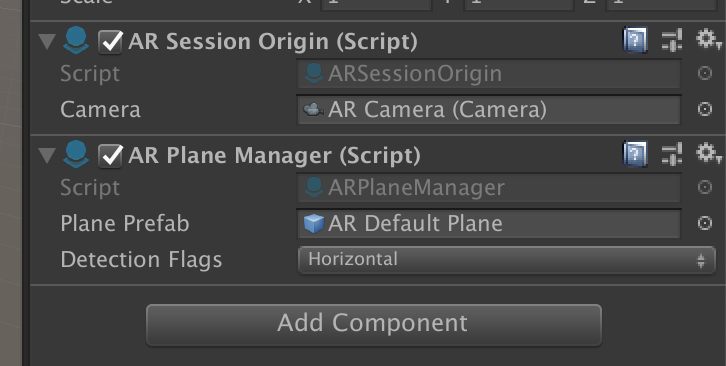
Create a new AR Session Origin game object from the Create Asset context menu. This game object contains a camera as a child. Because of this, you no longer need the MainCamera that is included in each scene created by Unity. Remove the MainCamera from the scene so that only the camera in the AR Session Origin game object remains.
Create a new AR Session game object from the Create Asset context menu. This game object has a component attached to it that is used to manage the lifecycle of an AR session. There should only be one of these in a scene. If you want to disable AR tracking, this is the component you would disable.
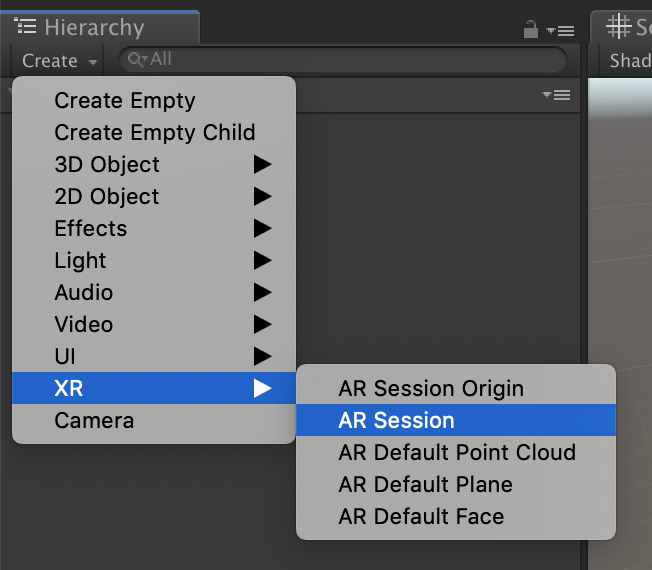
Next, you will need to create a game object that can be used to render planes as your device detects them. AR Foundation has two you can choose from, an AR Default Plane and an AR Default Point Cloud. For this tutorial, we will be using the AR Default Plane.
Create a new AR Default Plane game object from the Create Asset context menu. Then drag the game object into the Assets panel to create a prefab. Then delete from the hierarchy as you don’t need it to persist in the scene.
Attach an AR Plane Manager component to the AR Session Origin game object and drag the AR Default Plane prefab from the Assets panel into the Plane Prefab property. Then change the Detection Flags to the axis you want to limit placing objects on: Horizontal, Vertical or both.
Setup ARFoundation Components
Attach both the AR Plane Events and AR Place Object On Plane components to the AR Session Origin game object.
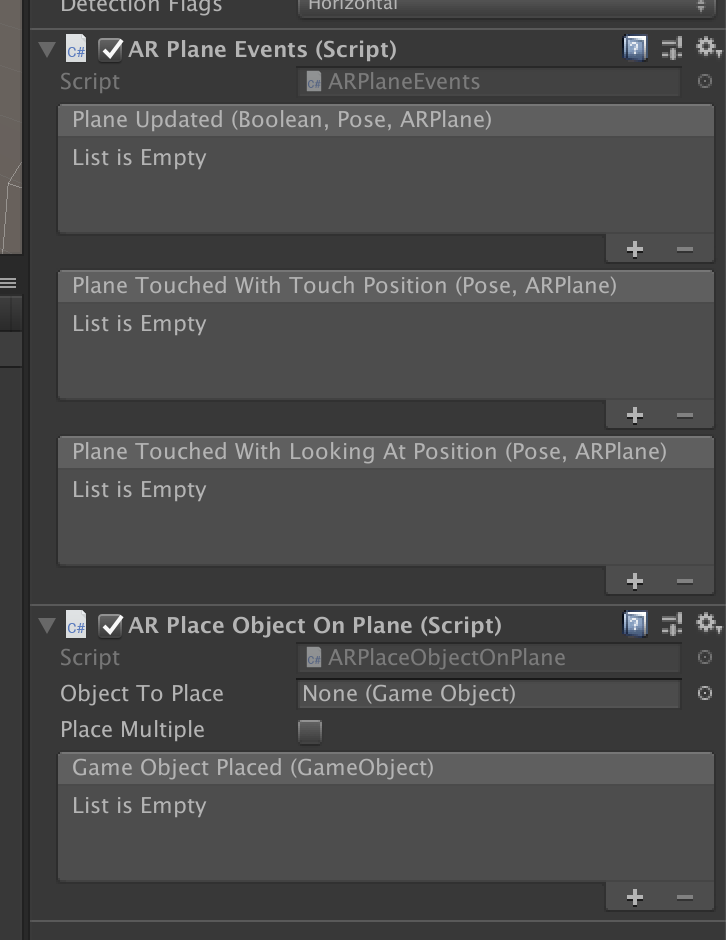
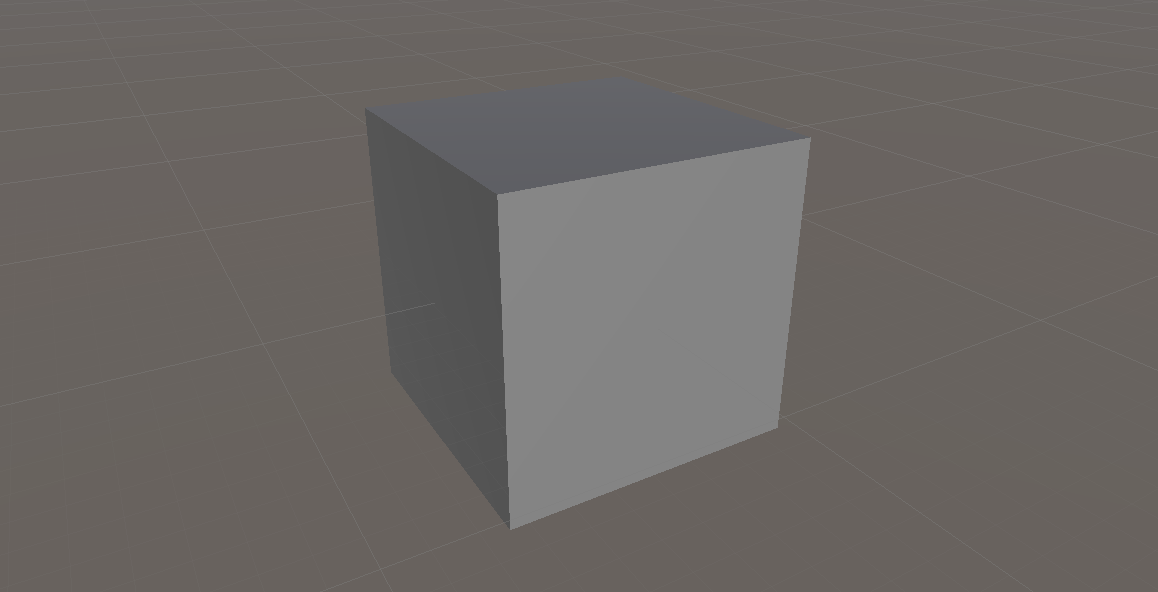
Create a new Cube and set the scale to Vector3(0.1f, 0.1f, 0.1f). Drag the game object to the Assets panel to create a prefab. Then delete from the hierarchy as you don’t need it to persist in the scene.
Drag the Cube prefab into the Object to Place property of the AR Place Object On Plane component and enable the option Place Multiple.
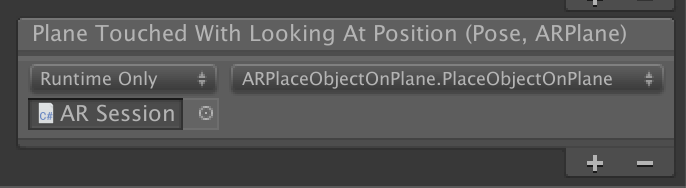
Create a new event in the Plane Touched with Touch Position event section of the AR Plane Events component and drag the AR Place Object On Plane component into the object box. Then select the dynamic function ARPlaceObjectOnPlane > PlaceObjectOnPlane.
Setup and Build iOS app
Now it’s time to put all of this on your phone or tablet.
Confirm that the scene is in the Build Settings panel and that iOS is selected as the build target.
Next, in the Player settings panel found in Editor > Project Settings, make sure there is a description in the Camera Usage Description field, the Target minimum iOS Version is at least 11, and Architecture is set to ARM64.
Then press Build and Run.
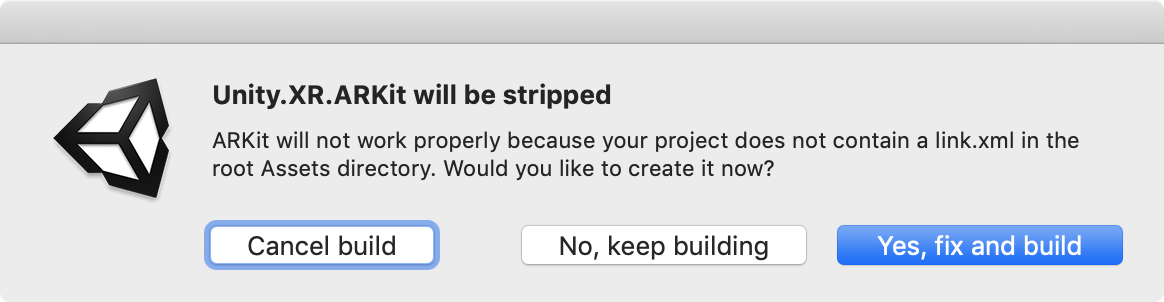
When the Unity.XR.ARKit will be stripped dialog pops up, select Yes, fix and build.
When Xcode opens, select your signing team and then hit Build and run.
That’s it! Now you have a simple AR app that will find horizontal planes and place objects wherever you tap.
This plugin is relatively new, so if you run into any issues please let me know either via GitHub issues or Twitter. Thanks!
This article was first published on December 30, 2018 on neogeek.dev. You can read the original article by clicking here.